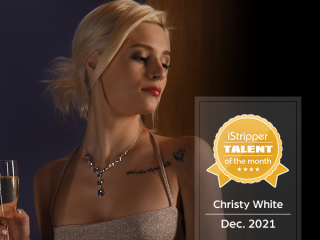
What a discover!!! This little greek beauty, friend of Inna Innaki who introduced her, is a PURE JEWEL!
Christy is a little angel, bubbly, smiling, enthusiastic, in one word: ADORABLE !
Very rare fact
@iStripper: we were already scheduling her take 2 even before she had left the studio!
And it's the very first time a Talent of the month reward is given after the release of 4 shows only!!!
But what shows!!!
- The Seventh Deadly Inch has surpassed all records! You are currently over 8 000 members to have her in your collection, whereas she has been released only 7 weeks ago!
- You've rated Pink Darling 4.72 / 5 !!!!
And you did well, she's sooo delicate and sweet in this show, as rickyd805 well explained :
"Christy is an absolute delight. She is so bubbly and cute, and the sheer outfit for this set was the perfect choice for her. If I could give the card more than a five I wouldn't hesitate to do so", as well as chantra2009:
"Christy is soo beautiful. She's so teasy and playful, I love it. Her abosolutely adorable smile warms me up. The lingerie is so pink and feminine. Brilliant show and a delightful xxx conclusion!! Give me more please!"- Tender And Lustful, my favorite! When she plays why her black transparent deshabille that reveals her perfect hips and highlight her long long legs, the whole world could fall apart!
- Fate-L Attraction released 2 weeks ago confirmed her roleplay skills! Not only she's intensely seducive when wearing lingerie, but she's also a fantastic stripper and this outfit gave us so many accessories to remove that the temperature rose like never!
And believe me, the best is still to come! Starting with
A White Tie Event, your rendez-vous for the new year's eve
😍https://www.istripper.com/customdata/forum/2021-11-19/JEEFxr7P.jpg
Watch the Live session we did on Discord : https://discord.gg/JPTWRNcHaH !!
and the Backstage pictures of her take2: https://discord.gg/qz4xvAbjUD

