Age Verification
This website contains age-restricted material including nudity and explicit content. By entering, you confirm being at least 18 years old or the age of majority in the jurisdiction you are accessing the website from.
Our parental controls page explains how you can easily block access to this site.
0
Customization Forum / Everything about iStripper
August 24, 2019
To anyone interested:
Please find an updated link to my nude.png's
http://pngs.virtuastripper.net/
This is an FTP site that is hosting the files now.
Site hosting, courtesy of @Wyldanimal with all due thanks and praise to him for allowing me to do so.
As before, if anyone wants a full nude (or clothed for that matter) .png please let me know and I will put it on the list of ones I am doing for myself as well.
I do all the new releases as they come out and will try to keep the "releases" section current as regularly as possible.
Cheers!!
PD48
pantalone
Joined in Nov 2010 224 post(s)
August 24, 2019
Thanks for a useful resource! Dunno why Totem don't publish all their stills as .pngs. They'd be a lot easier to play with....
August 24, 2019
Thanks for a useful resource! Dunno why Totem don't publish all their stills as .pngs. They'd be a lot easier to play with....
You're welcome sir!
I've no idea as I would spend a lot less time doing what I do with them, that's for sure.
Just reducing the size is easy but it gets a little more complicated cutting the girl out of the background in the .jpg file and then saving her as a .png. Especially with the more recent still photos that tend a little on the over bright side which makes it hard for my program to find the line where the background stops and the girl starts. Most times I have to cut her out with the erasure function instead of allowing the program to try to do it.
Oh well, it's something to do on the weekends instead of just ***** the day away while staying out of the heat outside.
August 25, 2019 (edited)
Unfortunately although png supports transparency, the transparency has to be created.
You can easily convert a jpg file to png but unless someone manually erases the white background of the photographs the png will still have a white background.
Some programmes will try and do this automatically but in a lot of cases are not particularly successful. Some of the lighter skin tones will be erased and if she is wearing antyhing white then forget it.
My guess is (and I stress this is my opinion) that Totem manually create their transparent pngs much as @pumpdude48 does.
For them to do it for every single photograph would be a huge amount of work.
August 25, 2019
My guess is (and I stress this is my opinion) that Totem manually create their transparent pngs much as @pumpdude48 does.For them to do it for every single photograph would be a huge amount of work.
@Number6
I suspect you are correct but I haven't asked them.
By trial and error (more error than trial to be sure) I have figured out what works for me and have it down to the point that even a difficult photo only takes about 10 minutes to prepare.
I just wish they would turn the lighting down slightly to allow just a bit more border definition around the girls. The true blond girls tend towards very light skin pigmentation which makes the separation issues even harder and then like you mentioned, white clothes and shoes are a completely manual job with the eraser function.
It's a labour of love to be sure, else I'd have given it up long ago.
August 25, 2019 (edited)


Sometimes when trying to mask out the background, switching to RGB and Alpha Channels or CMYK Channels and working on the individual pigment Channel makes it much easier.
Combined the RGB values might be difficult to separate.
but you might find the on one of the Channels, there is a larger difference that can be distinguished.
attached is a few sample Images it has a hidden image in it..
Can you tell what it is?
Combined the RGB values might be difficult to separate.
but you might find the on one of the Channels, there is a larger difference that can be distinguished.
attached is a few sample Images it has a hidden image in it..
Can you tell what it is?
TheEmu
Joined in Jul 2012 3309 post(s)
August 25, 2019 (edited)
On the relatively few occassions that I have removed the white background from an iStripper image I have used GIMP and have first flood filled the backgound with a vivid green (or anything that does not appear in the area I want to keep), used the colour select tool to select just that colour and deleted what it selects. It can get a bit fiddly flood filling in the background areas seen through the hair, but as with @pumpdude48 the whole process takes me only a few minutes.
Ocassionally there are ***** difficulties due to the flood fill ***** into areas of white clothing, but these can be reduced by tightening the tolerance on the flood fill and by ad-hoc methods that erect barriers at the points where the ***** through occurs - the simplest being to manually delete a few pixels at the ***** through site.
P.S. using GIMP's auto stretch contrast tool reveals @Wyldanimal's hidden images with one mouseclick.
palm19
Joined in Dec 2019 1 post(s)
December 21, 2019
A Question came up today that was the first time I think I've been asked it.
So I thought I'd share it.
many of us, know that we can make a Custom Card Image.
axxxx_custom.jpg
but I was asked about the Full PNG that is used on the Carousel.
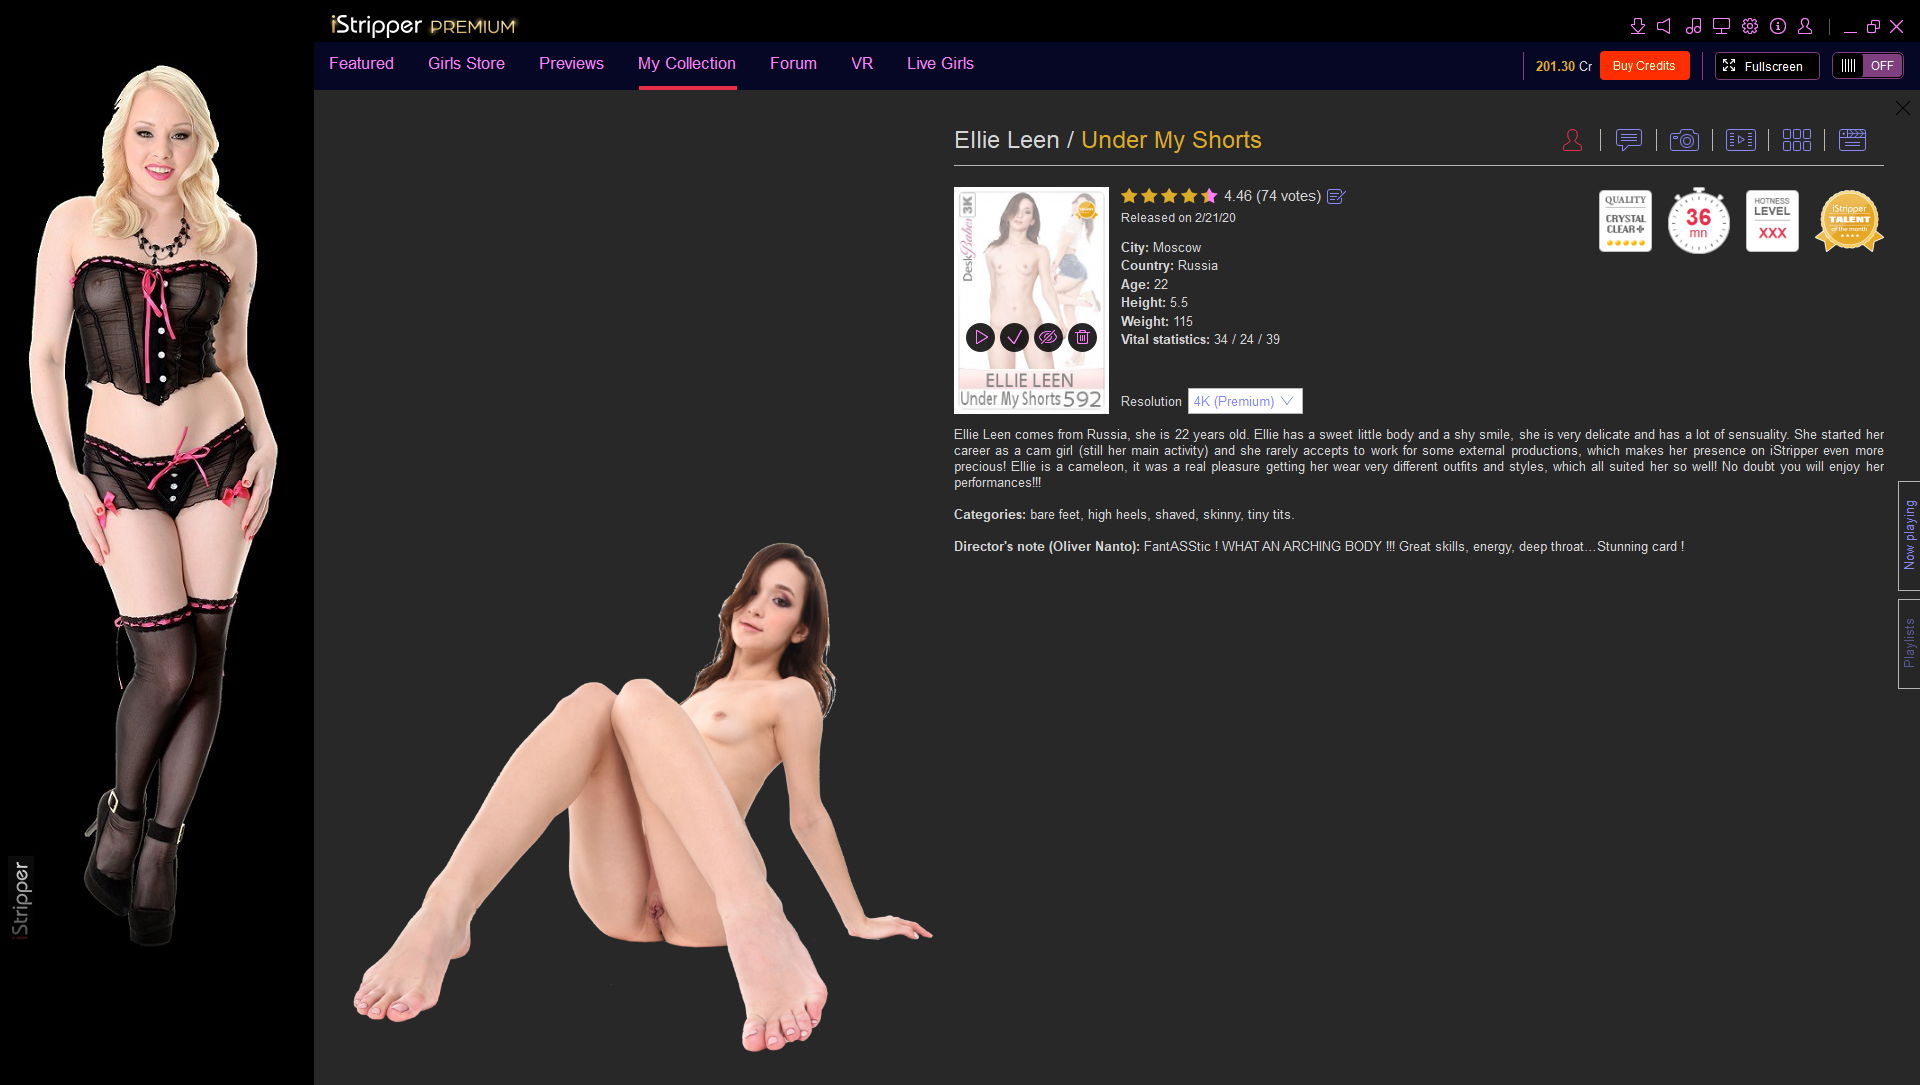
The answer is Yes, you can make your own custom Full.png images to use.
axxxx_full_custom.png
and along with that the nude preview image as well.
axxxx_nude_custom.png
the word _custom is added last to the file name.
the picture is a sample of one of my Data folders for card e0214
I added purple stars to the png's
edit:
Oh, yes... You have to Quit IS and restart it to see the changes.
IS caches the Images, so you will see the cached Image, not your changes until you restart.
So there you go. Happy Customization...
Hint to all you Skin Makers. HINT HINT HINT.....
if you make a skin for a specific Card, or Model. you can also Include a Custom set of images., a custom Card, a Custom Full png and a Custom Nude Png. either for just the one card, or for the Models full set of cards.
Make it a complete set, Custom Skin, Card, Full and Nude images. adds more value to your shared work.
And if you team up with a Scene creator, then you can have the Full Package!
A custom Scene, Skin, Card, Full and Nude pngs.
Making IS your very own, just got a whole lot more FUN !
Stanston
Joined in Aug 2018 1013 post(s)
February 26, 2020
Hi there,
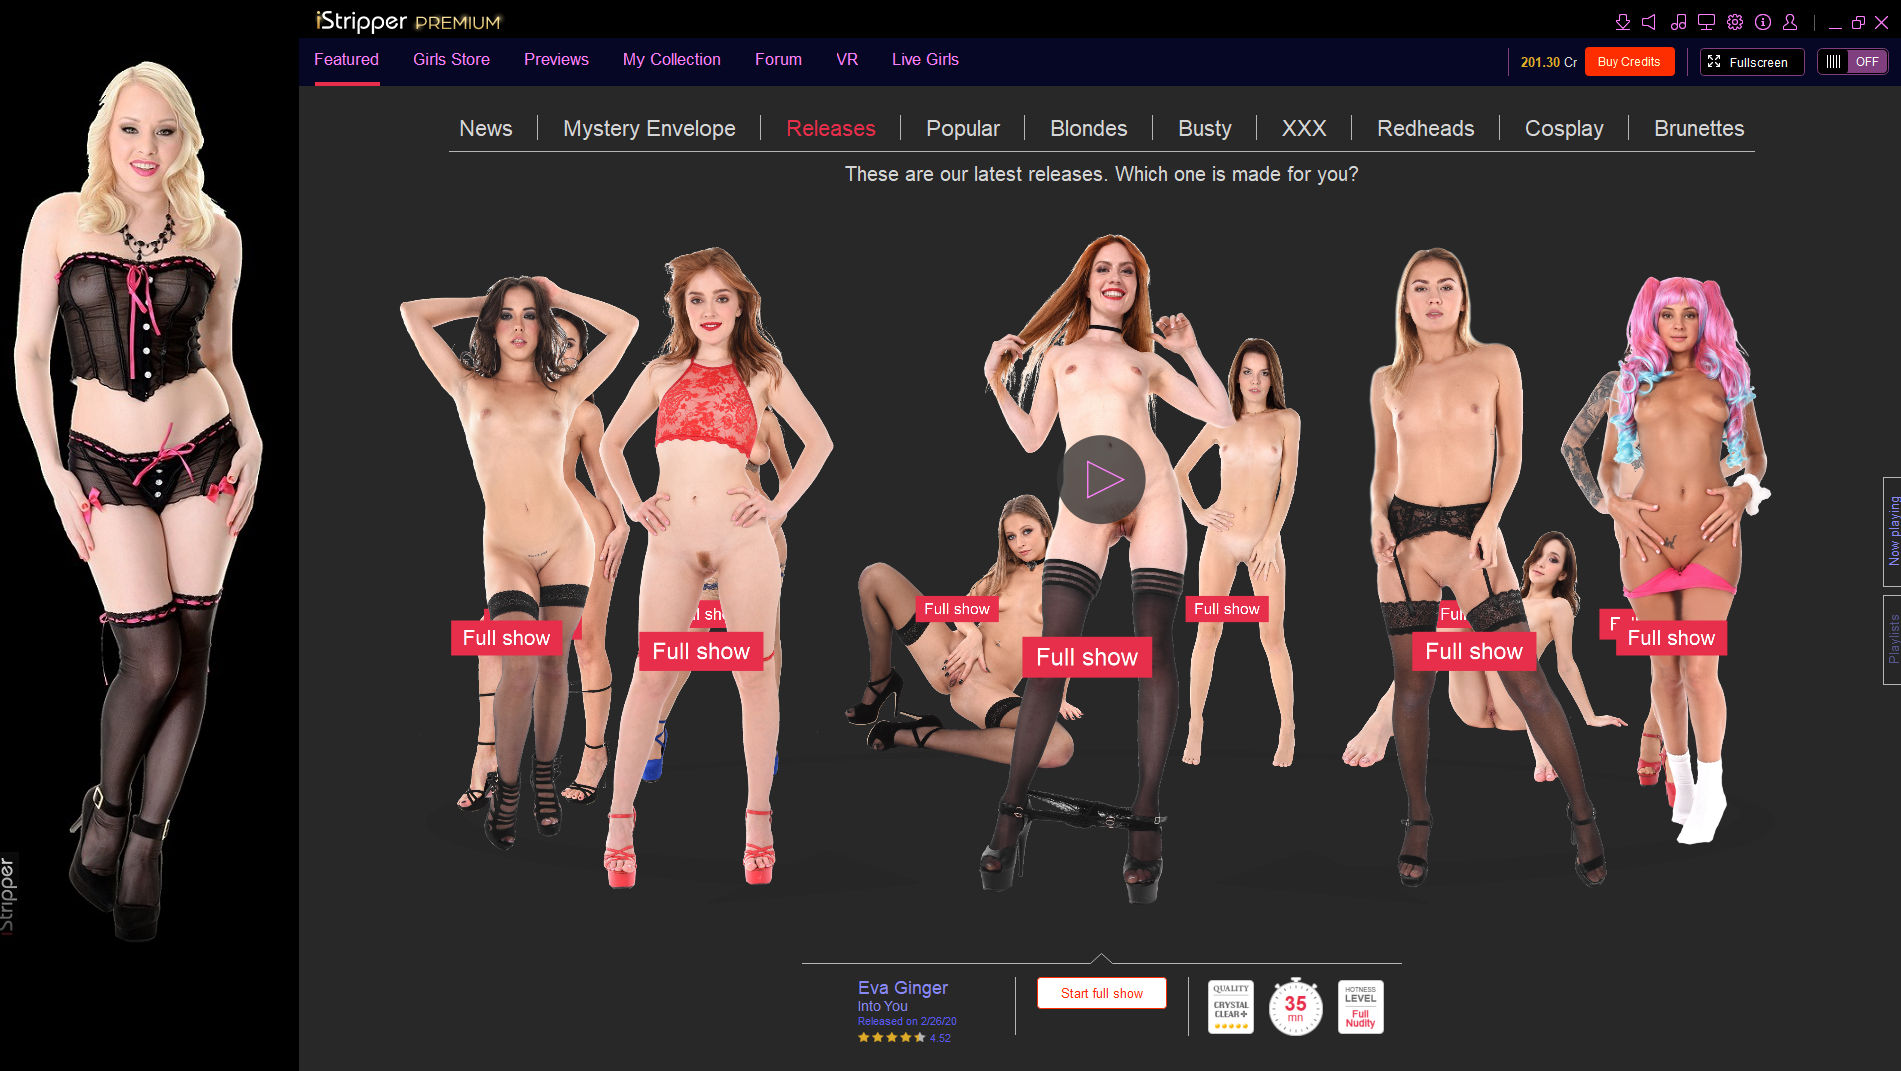
inspired by the Posts from @pumpdude48 i started to Create individual Pictures for the Main Model Site, here are some Examples.
And here is my overall Workflow. I created 2 PNG Files in Gimp (430 width x900 height and 1000 width x 900 height) for the different Formats from the original Pictures.
I Choose my favourite Pics from the Camera Tab, Copy the Files in to the correct Folder for each Model, Load it in Gimp and Scale it to the proper Size.
Here you have to individually Look for the Scale and the right Picture, to not loose too much Quality, in this case it is all based from your personal Choice.
Then i put the Picture (Copy and Paste) in my self created PNG Files and Cut out the white Background.
Sometimes, because i use the Choose from Colour Tool in Gimp to delete the white Background, other white Details (Underwear, Stockings, Shoes etc.) will also deleted.
But the Istripper Software Recover this Information, I think from the original File, and at the end all is fine,
regardless which Colourinformation from the Picture was Lost.
At the end i save the new created Picture with the New Name extension _custom.png without deleting the Original File, of Course ;-)
And that is it, relatively easy because it is only a Copy and Paste Action with a little bit of Knowledge in Gimp.
This is so enjoyable and relaxing Work, i Love all these Woman and with the possibility to Modify some Parts
of the Istripper Software Wow, absolutely Amazing. Thank you so much Totem to give us more or less easy Acces for this Possibility.
February 27, 2020
@Stanston
I like your work!
I do two versions of my custom png's from when Totem went from a 900 pixel height to 1500 pixel height for their 'fullhd.png' in the newer versions of the app.
I still do the 900 pixel height versions since some of the users here who d/l my customs want the smaller resolutions for their smaller/older displays.
One thing you may find with the shorter but wider photos you are using is that they cause problems with the lower resolution monitors. The png either causes a loss of visibility of some of the card information or the photo itself doesn't display properly. I had some problems along that line when I had a 720p display. I solved that by adding a hundred or more blank pixels to the tops of the shorter/wider photos and the app was able to scale and display them properly after that. Generally, as long as substance of the photo you are using is somewhat taller than it is wide then the app can display them properly but if not then there can be problems.
Another problem I have is that I prefer a standing full frontal nude pose with the model looking at the camera for my customs. This is for personal taste and also because they fit the carousels properly.
Since the photo sets don't always have that particular shot included I have had to add legs or eyes to the girls to get the look I want. I always use that girl's legs or eyes or even other more intimate parts and then try to blend them in together. Sometimes there is just no way to get the standing pose regardless of how I modify one so I end up with other less desirable poses (for me anyway) just to keep having a nude png for each card I have.
I am still learning the photo editing so my custom custom's don't always come out perfect but they are good enough for my needs. I have included a couple that I had to modify a little. If you look at the finished png and then look in the photo sets you won't find the photo I ended up with in the selection from Totem.
I have several hundred of them done and do more every week. I am doing older cards now from the 'a' series just to keep in practice since the new cards only come on per day for me anymore.
I enjoy it and it helps me relax a little after a long day.
I hope you keep on doing it and continue to get some fun out of it!
PD48
Stanston
Joined in Aug 2018 1013 post(s)
February 27, 2020 (edited)
Hi @pumpdude48
first of all i forgot abaout that. Thank you very much for your Inspiration to me and yes now with your Next Tipp
i created two new reference PNG's (1500 x 715 + 1500 x 1600) and i decided to start again from scratch.
Because with the bigger Reference images i get more Bang for the Bug :D And it's totally worth it to Start New.
And yes of course i will keep my work on, then the plan is to Transform my complete Collection for now and also in the Future. These Girls are so incredible Hot, it is a pleasure to work with the Footage.
And of course it is really really relaxing, or i would say it's a small Healing Therapy for your personal Mind ;-)
Best Greetings
Stanston
Joined in Aug 2018 1013 post(s)
February 27, 2020

Don't *****, this is the last post from me for now regarding this story here.
You can see in which direction it is going. and the new resolution pays off.
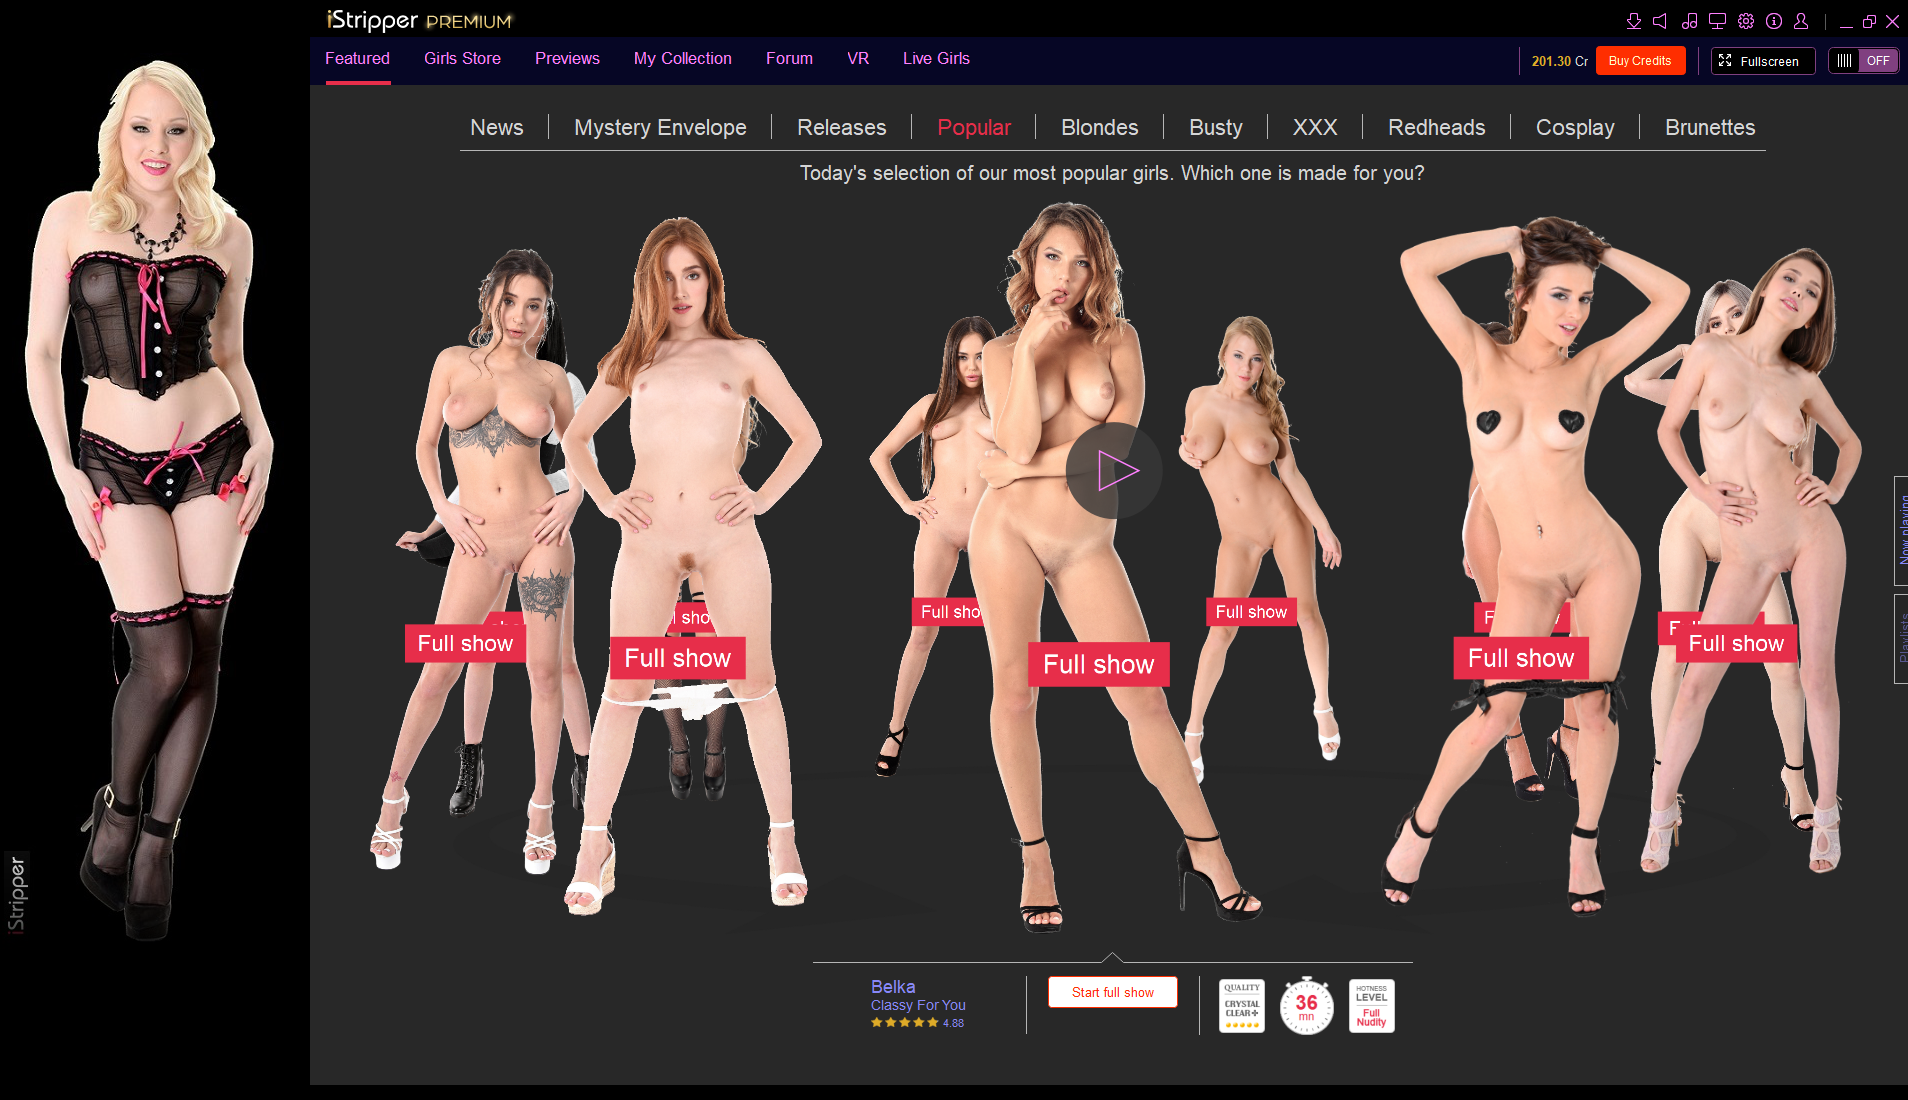
So here is the Viola Bailey's Collection, also one of my absolute Dreamgirls.
She has an enchanting face and 2 arguments which should not be contradicted :D
And it's damn hard to choose the right picture all the time. But hey, we humans love the ***** of choice :-)
So this is how it should have been for now, I can only recommend it to everyone, it is very satisfying.
You can see in which direction it is going. and the new resolution pays off.
So here is the Viola Bailey's Collection, also one of my absolute Dreamgirls.
She has an enchanting face and 2 arguments which should not be contradicted :D
And it's damn hard to choose the right picture all the time. But hey, we humans love the ***** of choice :-)
So this is how it should have been for now, I can only recommend it to everyone, it is very satisfying.
Stanston
Joined in Aug 2018 1013 post(s)
February 28, 2020

The connoisseur remains silent 😇
JassonYT
Joined in Oct 2017 23 post(s)
February 28, 2020
I know this might be a dumb question, im trying to look for my answer but i just cant find it so. I'm trying to put my custom png onto my cards to get the look of what everyone has^^^^ but everytime i save to file or relpace to original one in the models folder it just gets replaced with the original one istrpper put on. Im missing something so if someone could tell me I would be very thankful haha ive been wanting to customize my istripper for a while haha
Stanston
Joined in Aug 2018 1013 post(s)
February 28, 2020
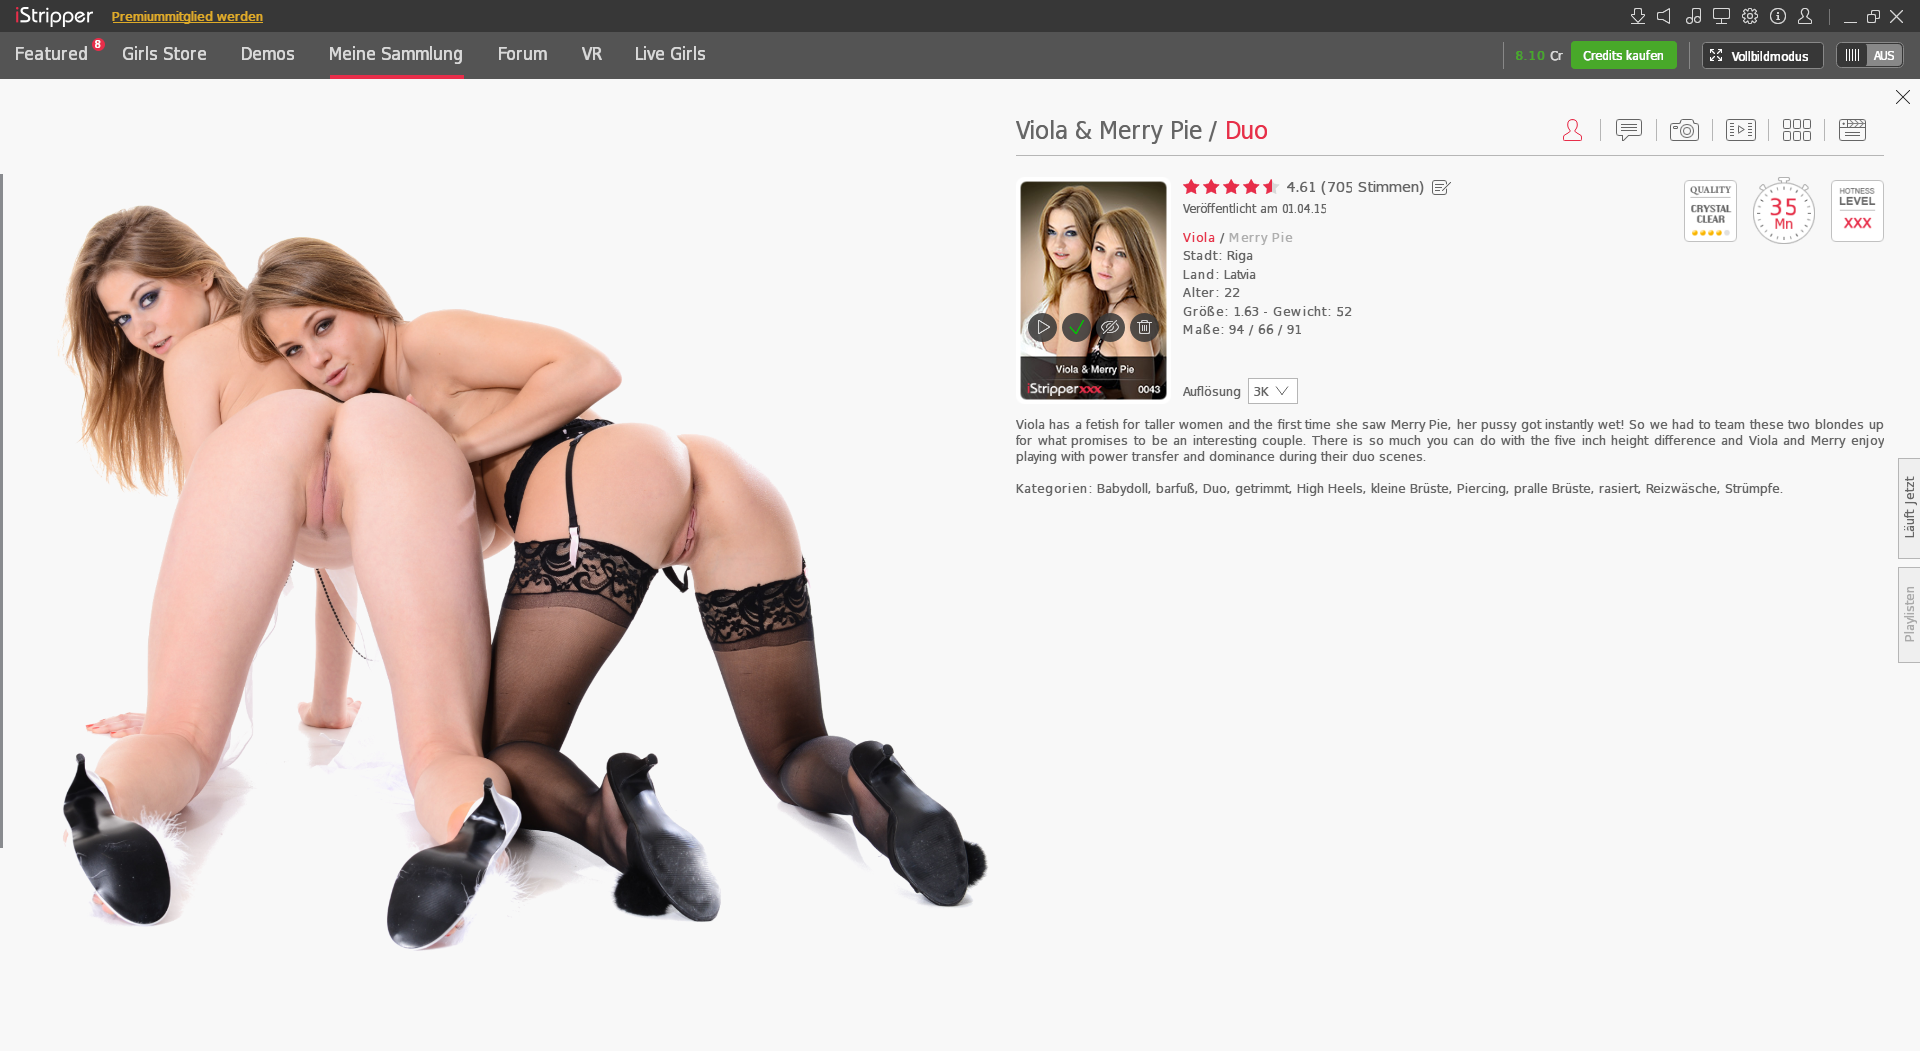
Hi @JassonYT
you Need to extend the Original Filename with _custom.png and you don't need to delete the Original File. Here is an Example
that's the Magic😉
you Need to extend the Original Filename with _custom.png and you don't need to delete the Original File. Here is an Example
f0095_full_custom.png
that's the Magic
JassonYT
Joined in Oct 2017 23 post(s)
February 29, 2020
@stanston Thank you so much! Time to get customizing!
February 29, 2020
I also updated my 1st post...
It's always good to go back to very 1st post to see how things started out...
It's always good to go back to very 1st post to see how things started out...
https://www.istripper.com/forum/thread/37892/1?post=556756
Everything about iStripper / Customization
edit: information updated 2-28-2020 A Question came up today that was the first time I think I've been asked it. So I thought I'd share it. many of us, know that we can make a Custom Card Image. axxxx...
February 29, 2020
Actually it would be:
eXXXX or fXXXX_fullhd_custom.png
The app doesn't recognize 'hd' customs in the a or c series nor from the earlier e or f series and doesn't have the 'full.png' for the d series at all.
I make both 'hd' and non-hd customs for every one I do regardless of the series letter but I don't think the app recognizes the older ones in 'hd'.
In fact I just renamed a few of my 'a' series custom png's to 'fullhd' from just 'full' and then restarted the app and the app no longer recognizes them and reverts to the standard clothed png from Totem.
I still do both since some members have smaller resolution screens and asked me to keep doing the 900 pixel versions which fit their monitors better. Especially if they are also using a custom skin which takes up some space on the left of the screen. But I think they would have to rename the smaller 'full' png's to 'fullhd' to get the app to recognize them in the later e and f series cards.
I wish I had a way of knowing just when Totem switched from 900 to 1500 pixels but I think it was about the time that the app changed to allow for 'premium' members and 4k cards, whenever that was.
Stanston
Joined in Aug 2018 1013 post(s)
February 29, 2020
I also updated my 1st post...
Thanks for updating your inbox posting, now there should be no more questions left
It's always good to go back to very 1st post to see how things started out...
And it's always good to see that People sharing their Knowledge and Passion.
JassonYT
Joined in Oct 2017 23 post(s)
February 29, 2020
Sorry to post another question :( but is there an easier way to find the models folder rather than searching through the thousands that are saved??
Stanston
Joined in Aug 2018 1013 post(s)
February 29, 2020 (edited)
At least nobody is known to me, it depends on what the Windows Explorer can do.
But I am the wrong person to talk to😉
In the end I search the directory manually too, but that is not the biggest hurdle.
Be patient, because in the end you will be rewarded anyway😍
Here, google is always useful ;-)
https://www.tenforums.com/tutorials/94452-search-file-explorer-windows-10-a.html
But I am the wrong person to talk to
In the end I search the directory manually too, but that is not the biggest hurdle.
Be patient, because in the end you will be rewarded anyway
Here, google is always useful ;-)
https://www.tenforums.com/tutorials/94452-search-file-explorer-windows-10-a.html
February 29, 2020
Sorry to post another question :( but is there an easier way to find the models folder rather than searching through the thousands that are saved??
If there is then I haven't found it.
If I don't want to scroll through the 4500 separate folders then I can use the search function but I have found that it is usually faster to just scroll than wait for my machine to find the right folder.
I have a separate 'mirrored' data folder that I keep offline, to store my custom png's and the other custom cards I use for the card placeholders in my collection.
I do my customizations in that folder and then copy the whole customized folder back into my online data folder.
Stanston
Joined in Aug 2018 1013 post(s)
February 29, 2020
This could be also a Workflow.
Switch to Icon View in the Explorer, Highlight any Folder in the Directory, and use the Arrow Keys on your Keyboar of course, and Navigate on this way.
Switch to Icon View in the Explorer, Highlight any Folder in the Directory, and use the Arrow Keys on your Keyboar of course, and Navigate on this way.
March 1, 2020
Actually it would be:
eXXXX or fXXXX_fullhd_custom.png
I use the form axxxx to mean the Letter of the card series, followed by it's 4 digit card number
Not to Specifically mean the Letter "A"
So you are 100% correct that for the Current Series of cards, the "e" and "f" series it would be as you show.
March 1, 2020
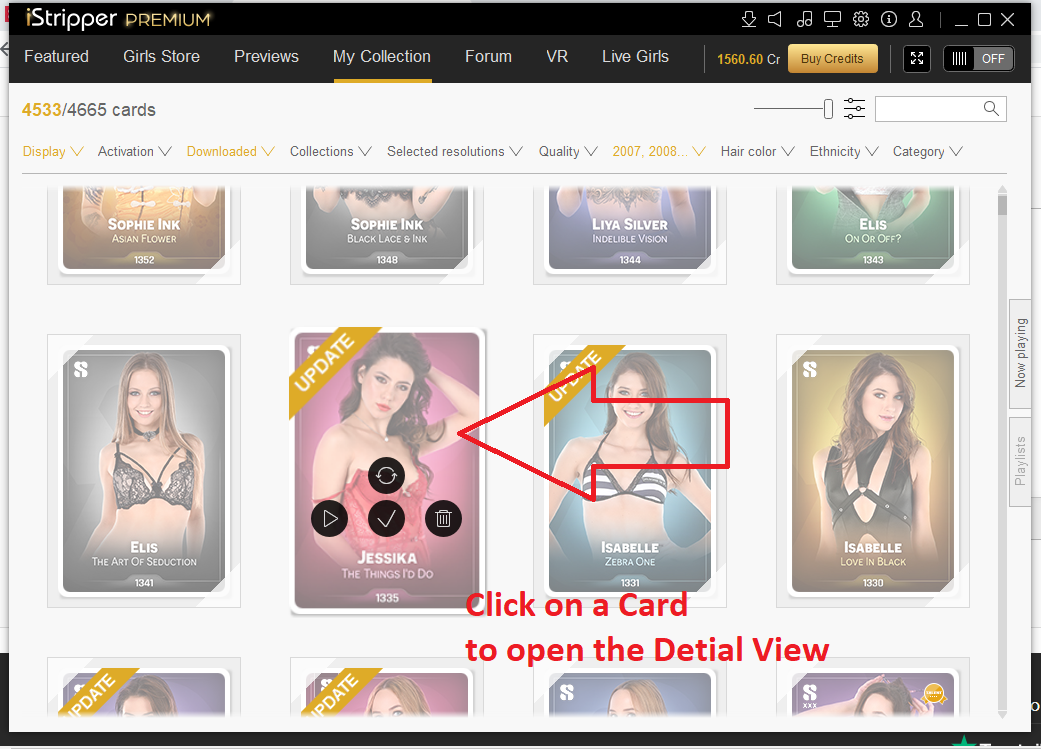
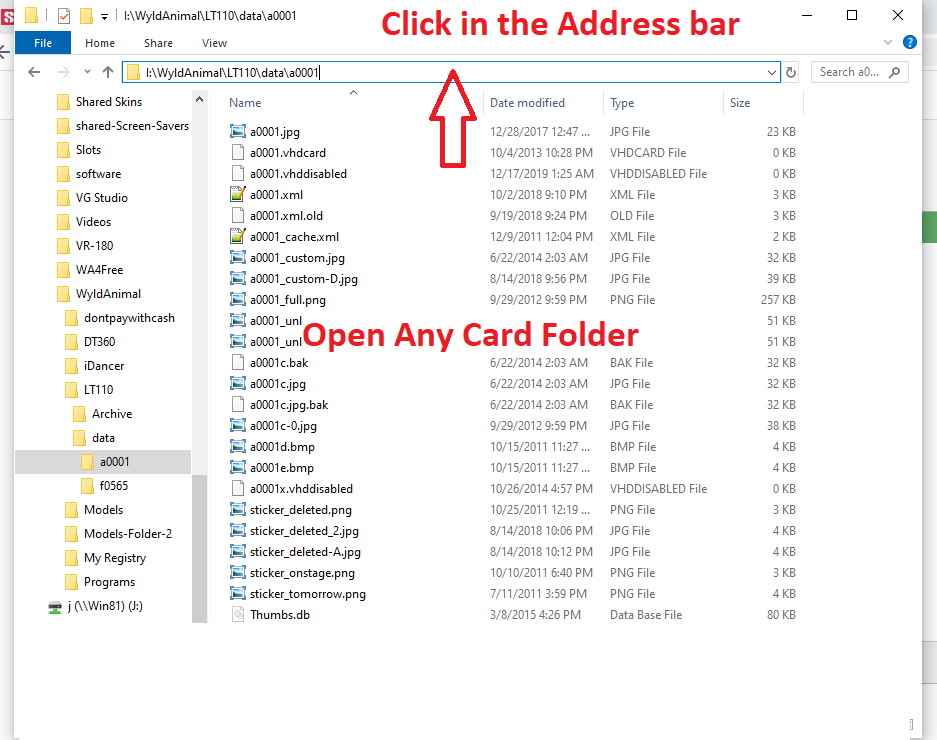
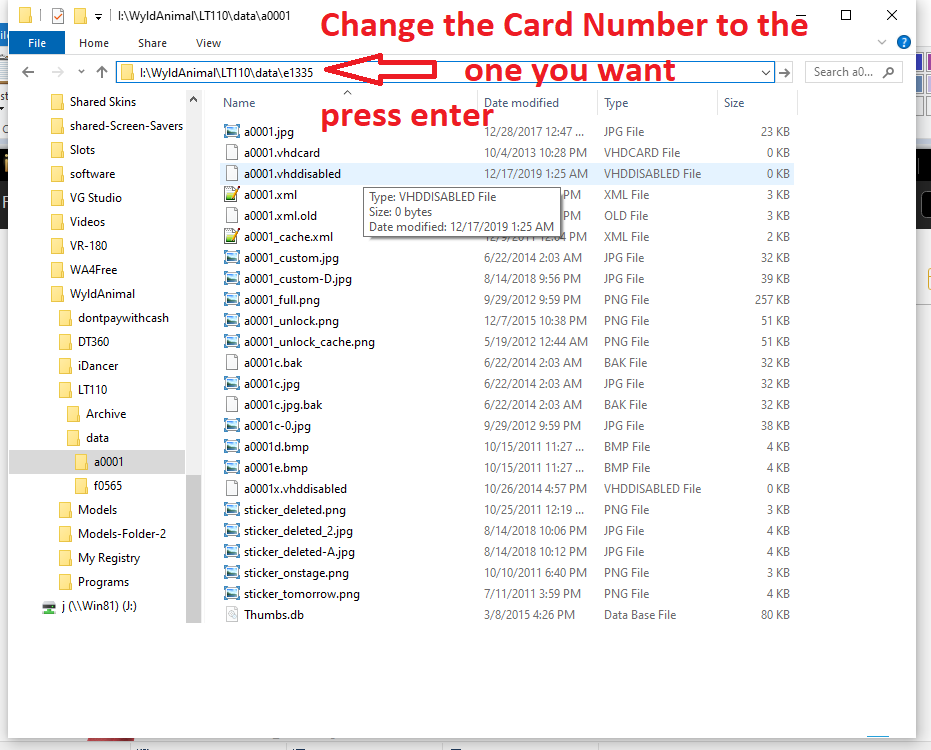

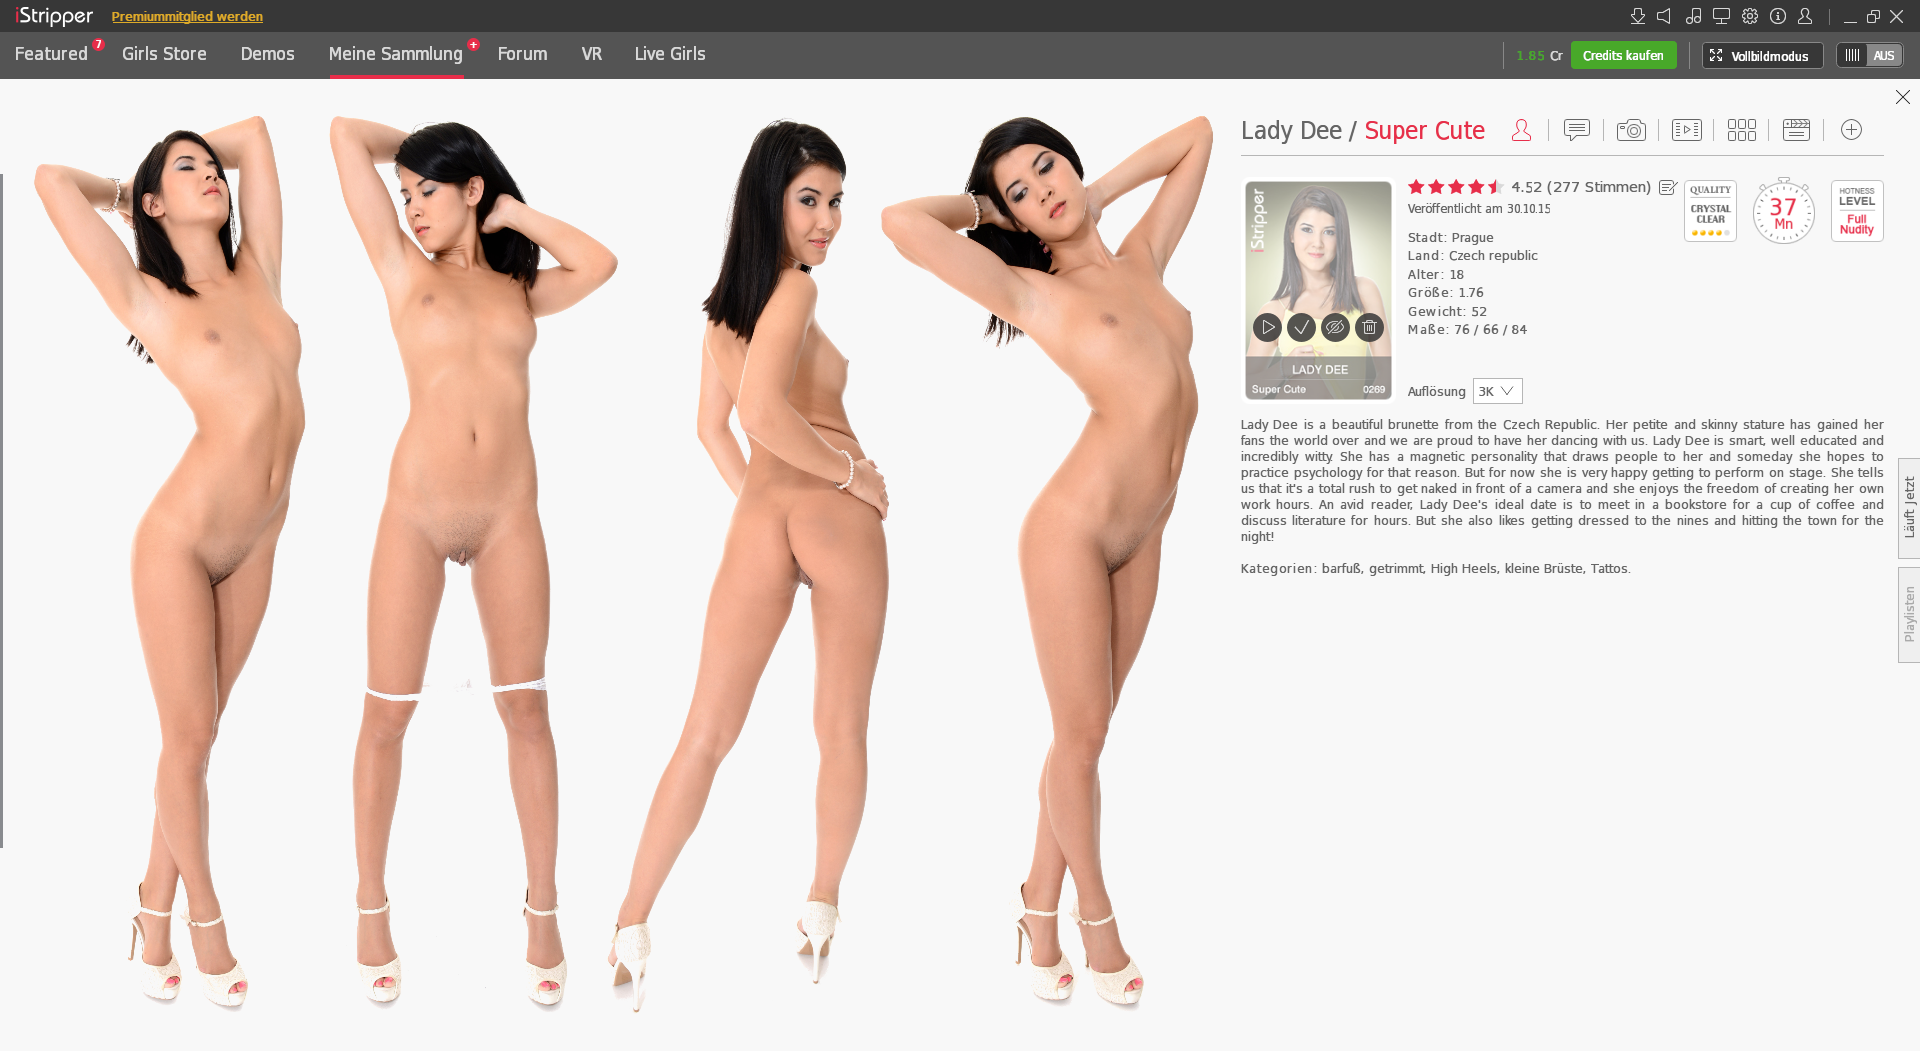
is there an easier way to find the models folder
in the My Collection View
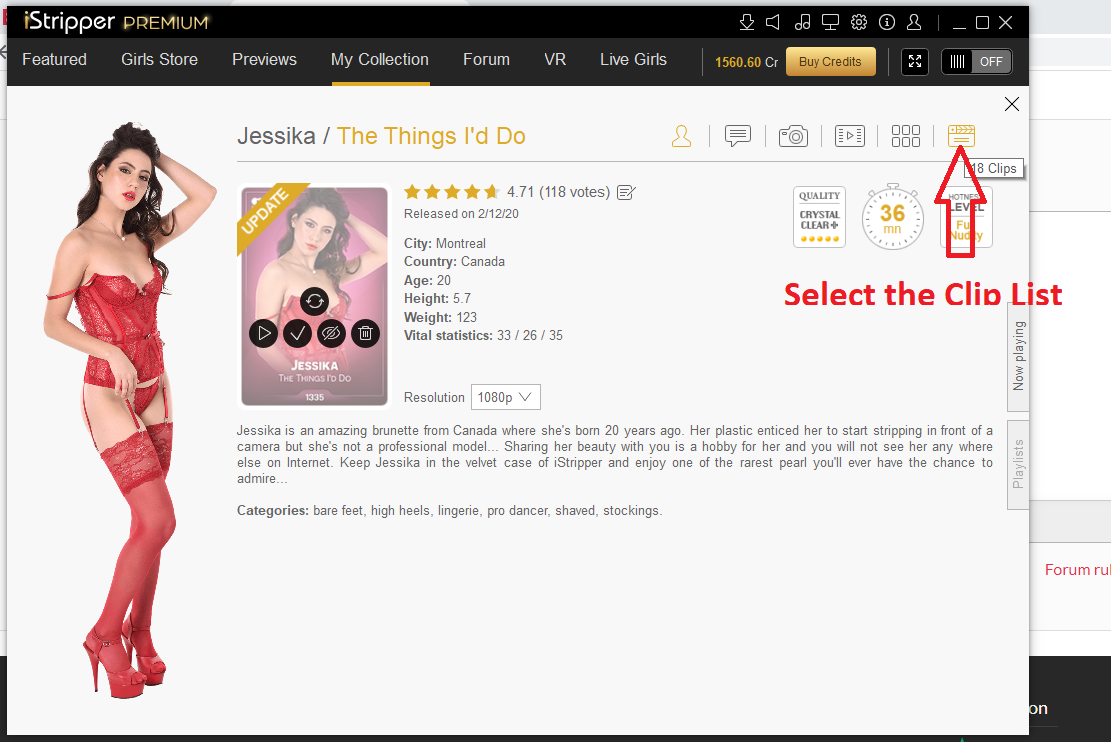
Click on the Model to show the Details View
Then Click on the Clip list Icon.
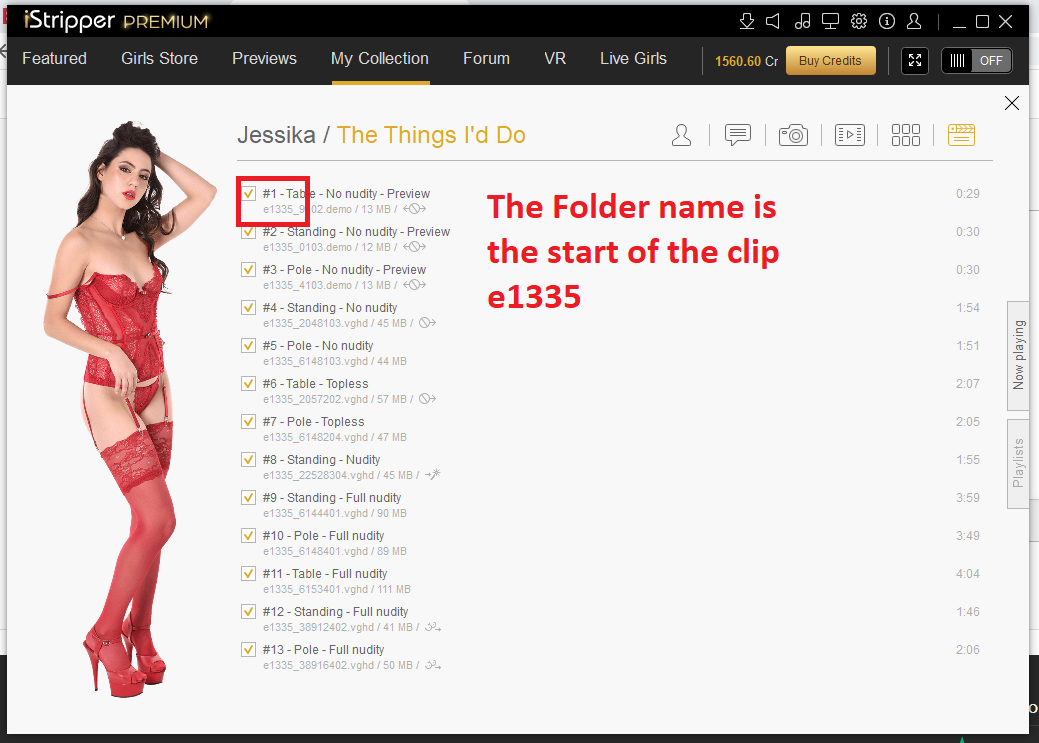
in the Clip list you will See the Card Letter and Number
Now you Know what Folder you have to open.
In File Explorer, open Any models Folder or Data folder
Click in the Address bar.
Change the Card in the Address bar to the Card you Want, and Press Enter.
SetFuego
Joined in Mar 2008 730 post(s)
March 1, 2020
I use the form axxxx to mean the Letter of the card series, followed by it's 4 digit card numberTo avoid misunderstandings, you should always use the form yxxxx, this should not be ***** until the card series 'y' is available.
Not to Specifically mean the Letter "A"
Stanston
Joined in Aug 2018 1013 post(s)
March 22, 2020
Just a small Experiment 😀
You are not allowed to participate yet
As a free user of iStripper, you are not allowed to answer a topic in the forum or to create a new topic.
But you can still access basics categories and get in touch with our community !